Jeeter is installed — now how do you use it? This guide covers initial setup, commissioning a Matter device, and all app features.
Not installed yet? Start with the Jeeter installation guide.
Interface at a glance
The app is organized into 5 tabs in the bottom bar:
| Tab | Icon | Purpose |
|---|---|---|
| Jeedom | Home | List of Matter devices in your Jeedom |
| Devices | Devices | Devices detected / commissioned by Jeeter |
| BLE | Bluetooth | BLE proxy — scan, connect, commissioning |
| Info | Info | Matter server status, OTBR/Thread |
| Settings | Gear | IP, ports, API key, notifications |
The top bar shows the app name and WebSocket connection status (animated dot).
Step 1 — Configure Jeedom access
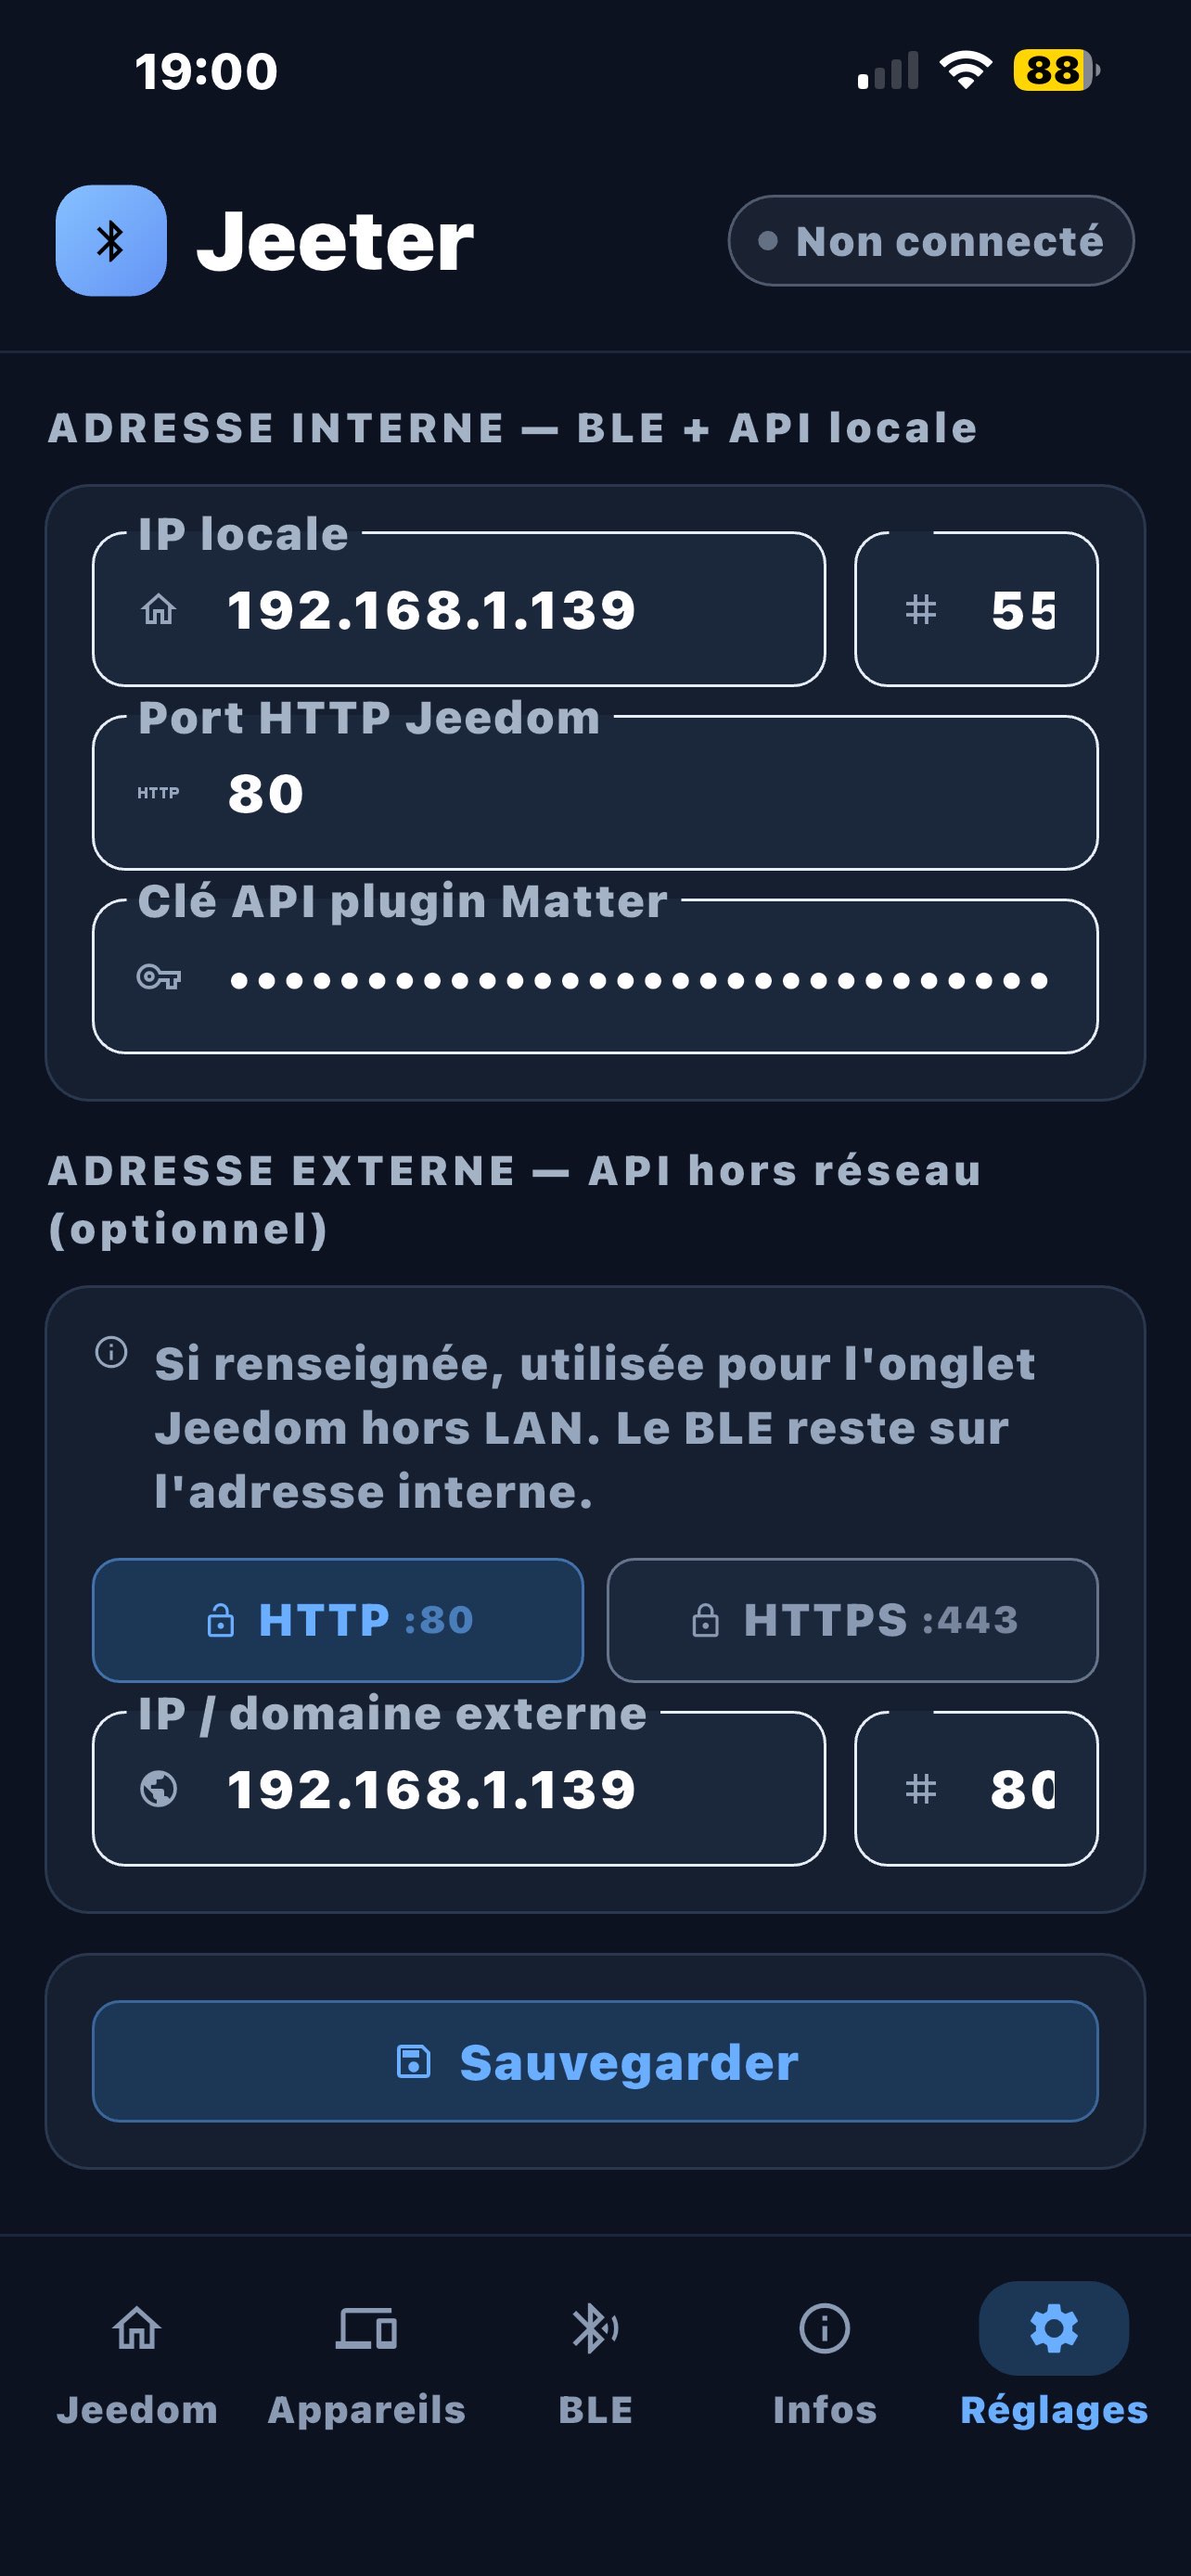
Settings tab → Internal address
Enter your Jeedom's local network settings:
| Field | Value |
|---|---|
| Local IP | Your Jeedom's IP (e.g. 192.168.1.100) |
| BLE port | WebSocket BLE proxy port (default 5580) |
| Jeedom HTTP port | Jeedom interface port (default 80) |
| Matter plugin API key | Plugins → Matter → Configuration → API Key |
The API key is required for the Jeedom tab and commissioning. Without it, devices won't appear.
Tap Save — settings are persisted between sessions.
Remote access (optional)
The External address section lets you use the Jeedom tab outside your local network (mobile data, other Wi-Fi):
- Enter the external IP or domain (e.g. via Tailscale:
100.x.x.x) - Choose
httporhttpsprotocol and the corresponding port
For secure remote access without public exposure, Tailscale is the ideal solution. Your Jeedom's Tailscale address goes directly in the "IP / external domain" field.
BLE always uses the internal address — the WebSocket proxy must be on the local network.
Step 2 — Check Matter devices
The Jeedom tab shows all active Matter devices reported by the plugin.
Each card shows:
- Device name
- Manufacturer and firmware version if available
- Online (blue) or Offline (red) status
- Matter node number
The summary at the top shows the count of online, offline, and total devices.
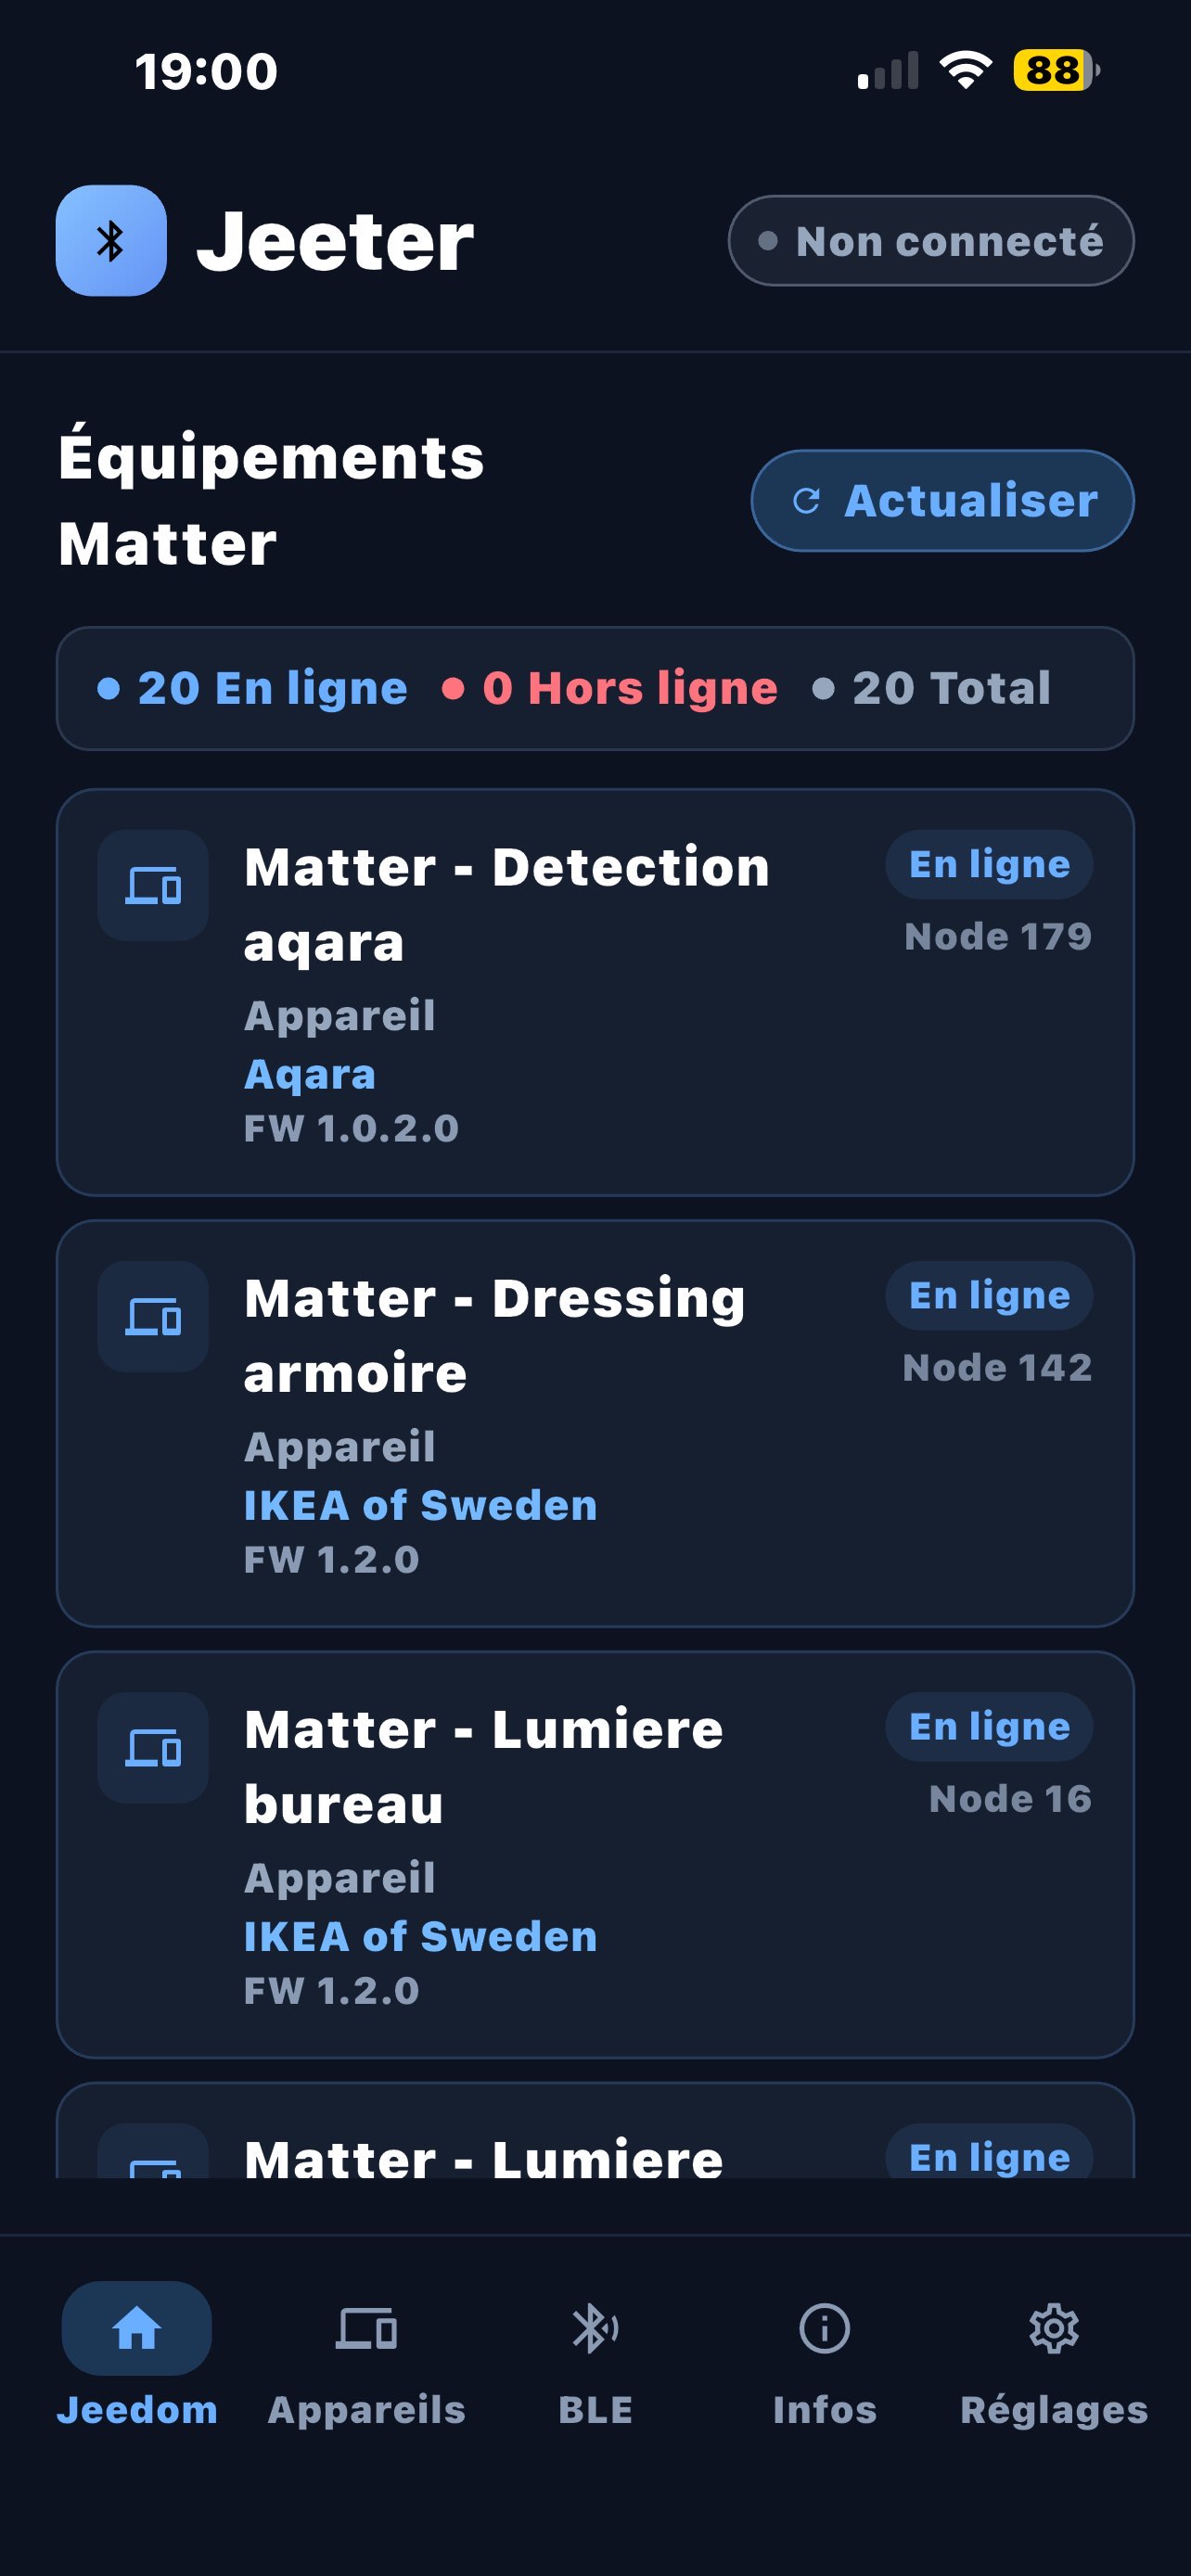
Tap Refresh to manually reload the list.
Step 3 — Commission a Matter device
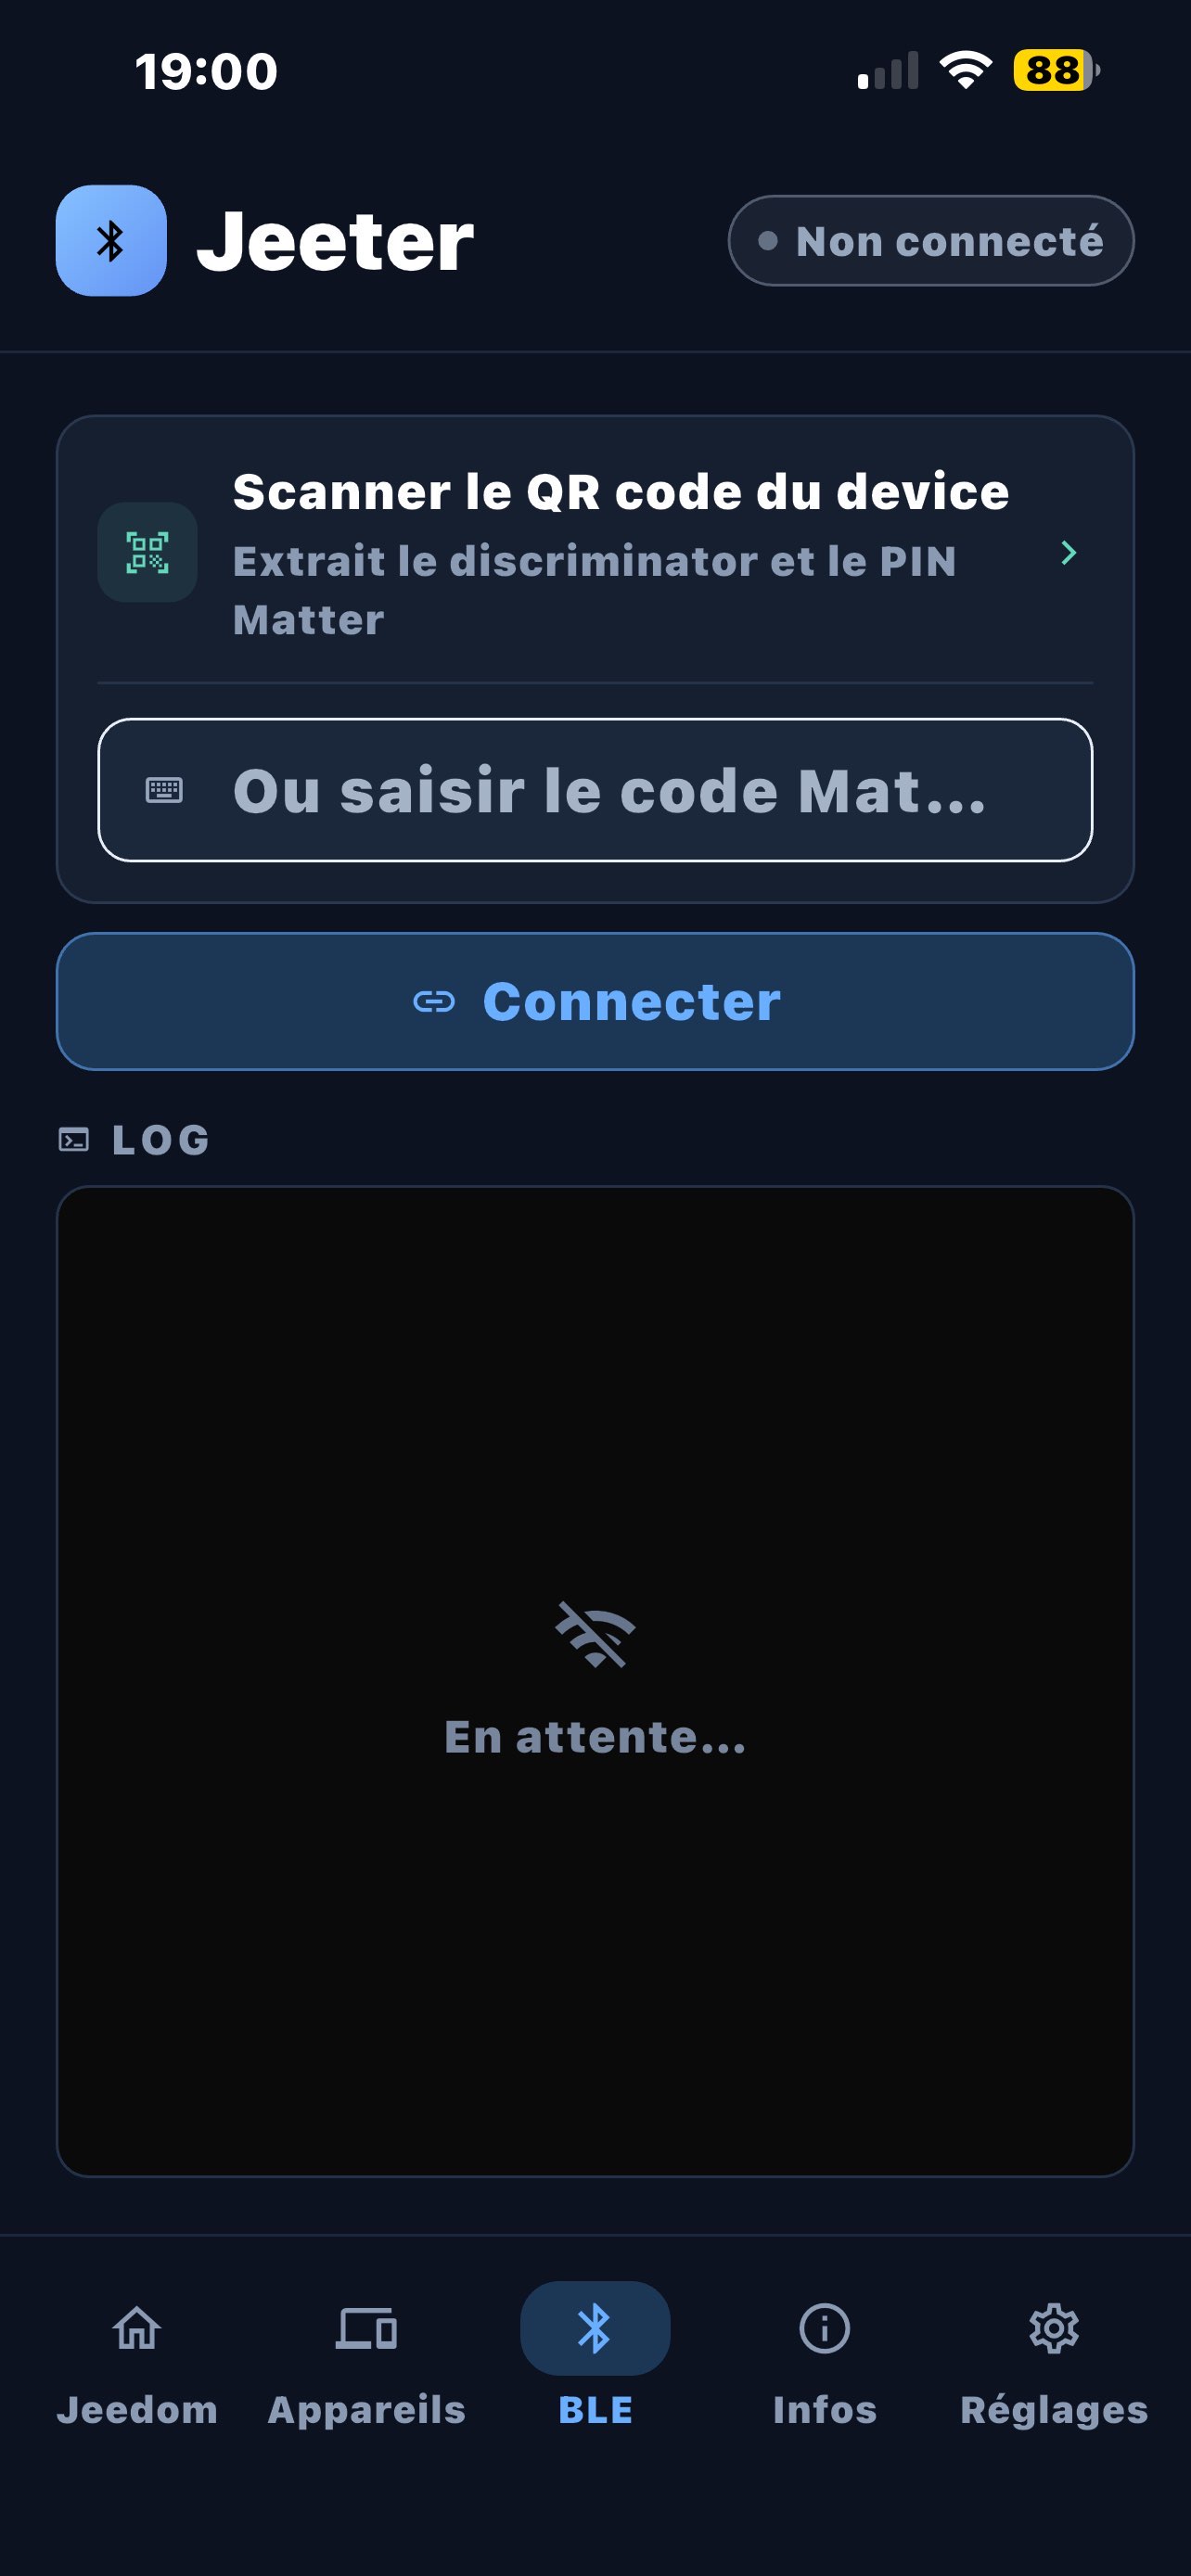
Commissioning is done from the BLE tab.
3.1 — Scan the device QR code
Tap the QR code icon in the central card:
- The camera opens in scan mode
- Point it at the Matter QR code printed on the device or in its manual
Once scanned, Jeeter displays the extracted QR code information:
- Discriminator — unique BLE device identifier
- Setup PIN — pairing code (masked — tap to reveal or copy)
- Transports — supported BLE / Wi-Fi / Thread
- Vendor — device manufacturer
No accessible QR code? Enter the code manually in the text field, then press Enter.
3.2 — Connect the BLE proxy
Tap Connect (blue button below the QR card):
- Jeeter establishes a WebSocket connection with the Jeedom Matter plugin
- The top bar turns blue:
Connected · vX.X
A progress bar appears at the top of the tab, tracking commissioning phases:
| Phase | Description |
|---|---|
| Scan | BLE scan for nearby Matter devices |
| Connect | BLE connection to the target device |
| Services | GATT service discovery |
| BTP | BLE Transport Protocol handshake |
| Live | Active data stream — commissioning in progress |
3.3 — Start commissioning from Jeedom
Once the proxy is connected and the QR code loaded, tap Add to Jeedom:
- Jeeter sends the Matter code to the plugin via API
- The plugin drives the smartphone (BLE scan → connect → BTP handshake)
- Commissioning completes — the device joins the Jeedom Matter fabric
- A success notification appears with the assigned
node_id - Jeeter automatically syncs the node and refreshes the Jeedom tab
The phone must remain within BLE range of the device throughout commissioning (~30–90 s).
The log at the bottom of the BLE tab details each step in real time — useful for debugging.
Devices tab
This tab lists:
- Commissioned devices via Jeeter (with date/time, node_id, manufacturer)
- BLE devices detected during the last scan but not yet commissioned
Commissioned devices have a blue border. Swipe left to remove from local list (this does not delete the device from Jeedom).
Info tab — Matter server status
The Info tab queries the Jeedom Matter plugin directly and displays:
Matter server
- Matter SDK version
- Fabric ID
- Schema version
Capabilities
- BLE Proxy enabled / disabled
- Bluetooth available
- Wi-Fi and Thread credentials set (and Wi-Fi SSID if configured)
OTBR — Thread
- Border Router status (enabled / disabled)
- OTBR mode
- Border Agent ID (copyable)
- Thread TLV dataset (copyable)
Availability notifications
In the Settings tab, enable Notifications to be alerted when a Matter device changes state:
- Allow notifications when prompted by the app
- Choose the polling interval (1 to 60 minutes)
Jeeter polls Jeedom periodically and sends a notification if a device goes offline or comes back online.
Troubleshooting
| Problem | Solution |
|---|---|
| Jeedom tab empty / error | Check API key and IP in Settings — tap Refresh |
| Proxy not connecting | Check local IP and BLE port (5580 default) — Matter plugin must be running |
| QR code not recognized | Verify it's a Matter QR code (prefix MT:) — try manual entry |
| Commissioning stuck in Scan phase | Device not in commissioning mode — reset it (hold the reset button) |
| CBError code 8 (iOS) | Install the Matter Bluetooth profile — see installation guide |
| Commissioning failed — timeout | Phone was too far from the device during commissioning |
| Node_id created but missing in Jeedom | Wait a few seconds and refresh the Jeedom tab — or force sync from the plugin |
| Silent notifications | Check Jeeter notifications are allowed in iOS/Android system settings |